EC2 is one of Amazon Web Service (AWS) services that provide IaaS (Infrastructure as a Service) Cloud Computing for public. You can have your own infrastructure Cloud instantly. the services includes; Server (Virtual Machine), Firewall, Load balancing, Network and so on. Either for your Public Cloud or Private Cloud or maybe both (Hybrid). Within less a day you are able to setup a complete infrastructure with low cost investment (CAPEX). And that would be the best idea to start your start-up company, to make it less hassle on technical issues and investment risk.
Create First Instance
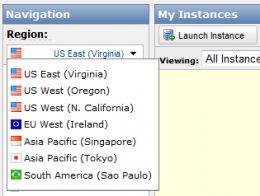
Login to your AWS account and go EC2 page (https://console.aws.amazon.com/ec2/home). There are many name for virtualization from Cloud Provider, but in AWS they called for Virtual Machine as Instance. Klik on Instance on the left menu and if you don't have Instance yet, it'll direct you to wizard page to create your first instance. Notice the country list on the top of the left menu, those are the country that your Instance would be located. Choose the nearest location from your most of visitor from. Let say your company is from japan but most of your visitor are come from Indonesia, then i suggest you choose Asia Pacific (Singapore) as your Region. [caption id="attachment_189958" align="aligncenter" width="315" caption="EC2 - Country List"][/caption] Then click on 'Launch Instance' to start the wizard page. On this tutorial lets we try 'Classic Wizard' so we know every configuration options. Click 'Continue'.
13377473172130188630
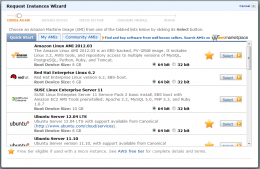
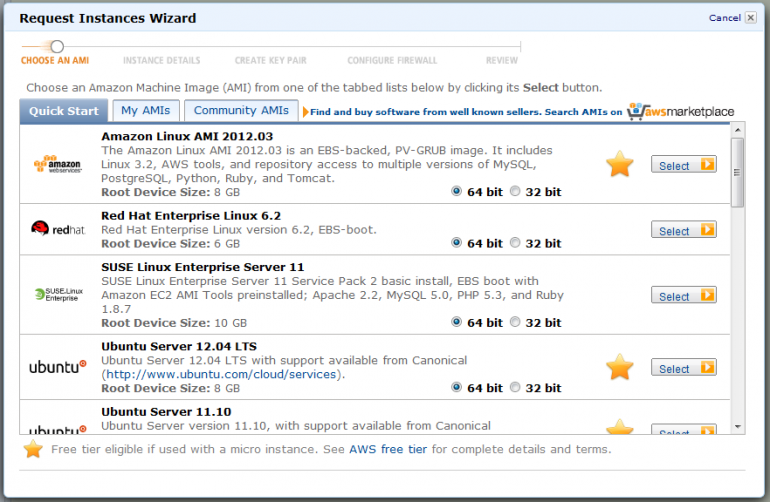
At second screen you have to choose an AMI (Amazon Machine Image). AMI is a server image with pre-configured installation. In contrast you just choose Operating System (Linux/Windows), Distribution (RHEL/SLES/Ubuntu), Version (Ubuntu Server 12.04 LTS / Ubuntu Server 11.10) and Architecture (32/64 bit). AWS also provide Community based-AMI, that is an image that created and published from the community, an Image that maybe already tuned by focusing on security, scalability, easy-of-use and many other taste that you can try every time you want. Click on 'Select' button when you're done. [caption id="attachment_189969" align="aligncenter" width="636" caption="EC2 - Instance Detail"]
1337748406319296413
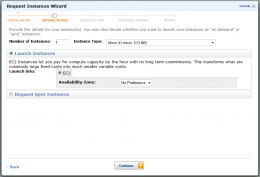
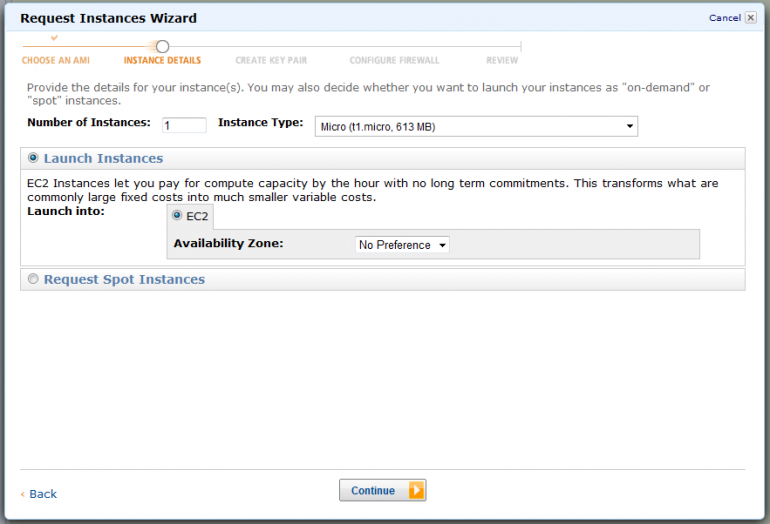
[/caption] This screen will let you to choose Instance hardware specification, in AWS it's bundled with several package names. Find your best match between Specification and your application needs. Let we choose 'on-demand' Instance for this example, we only need to choose the host location for our instance. After that click on 'Continue' Button to go to the next screen. [caption id="attachment_189992" align="aligncenter" width="645" caption="EC2 - Instance Detail"]
1337756081761944348
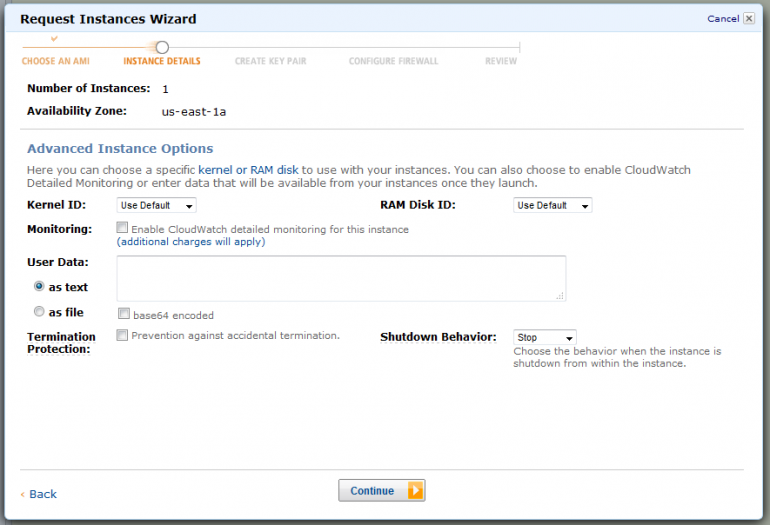
[/caption] You could skip this step and leave it with their default configuration. But notice on Monitoring field, by default there's a monitoring tools for our instance, but by enabling this feature, your instance would be monitored in detail. Move to the next screen. [caption id="attachment_189994" align="aligncenter" width="647" caption="EC2 - Instance Detail"]
13377564571117354158
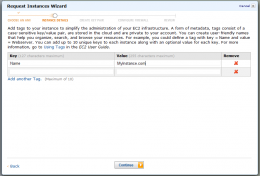
[/caption] This screen is very useful for administration purpose, make it easy to manage later or for your customizable report. You can add to 10 tags to identify each of your instance. Click 'Continue' button. [caption id="attachment_189996" align="aligncenter" width="650" caption="EC2 - Create a Pair"]
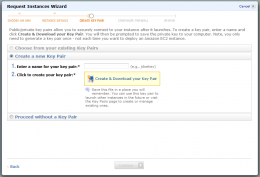
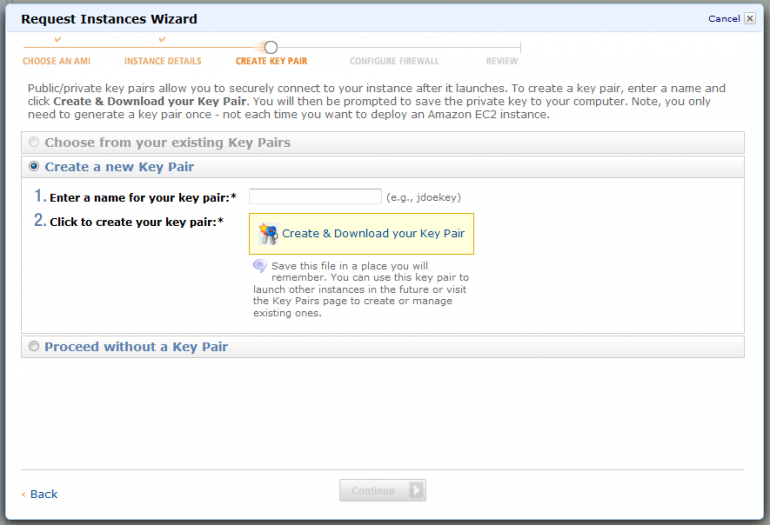
13377568271445942823
[/caption] From this screen you must create a key pair to access your instance. What is key pair? Key pair is authentication method that AWS use to identify the authorized user to access their authorized Instance. With this method you'll not be ask for your user and password, because all authentication information is gathered on key pair file. Save this key pair and save it in save place. To start using this key pair i will describe it on the next post. [caption id="attachment_189997" align="aligncenter" width="656" caption="EC2 - Configure Firewall"]
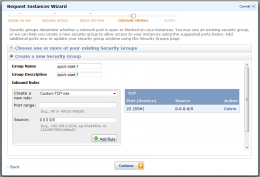
13377574181470039717
[/caption] Let's leave this screen with its default value. I'll talk more about this screen on other post. [caption id="attachment_189998" align="aligncenter" width="656" caption="EC2 - Review"]
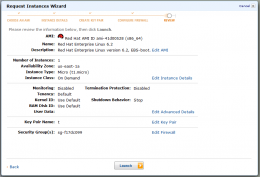
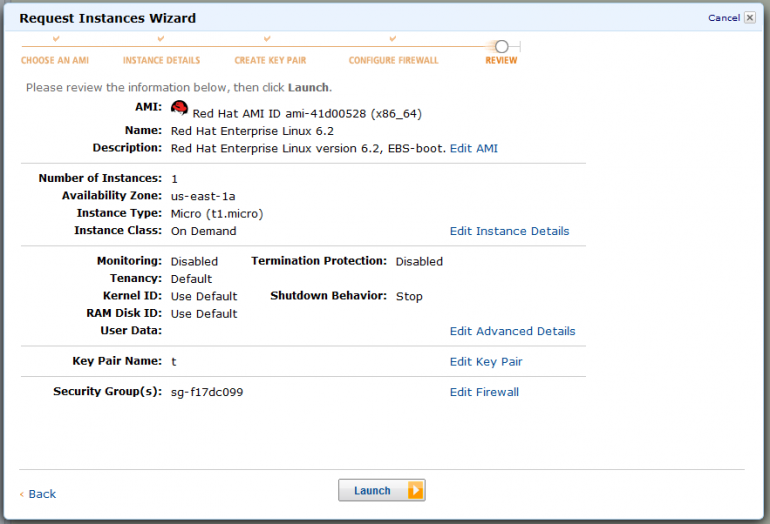
13377576551264292826
[/caption] This is your final screen from your wizard to create an EC2 Instance. You can review all your previous setting before you commit all the configuration, then an Instance would be create after you click on "Launch' button. That's it, on the next post we'll learn on how to setup with the most basic configuration and access our instance.